
「Vitis Target Platform HW構築編」の記事で、Vivado を使った HW Component 構築方法について紹介しました。3回目となる今回は PetaLinux 2019.2 を利用して Vitis Target Platform の作成 Software 編の Flow のご紹介をいたします。
SW Component の Flow
まずは前回の復習ですが、Vitis での Acceleration Application の Tool Flow は以下の図のよう4つの Step があります。
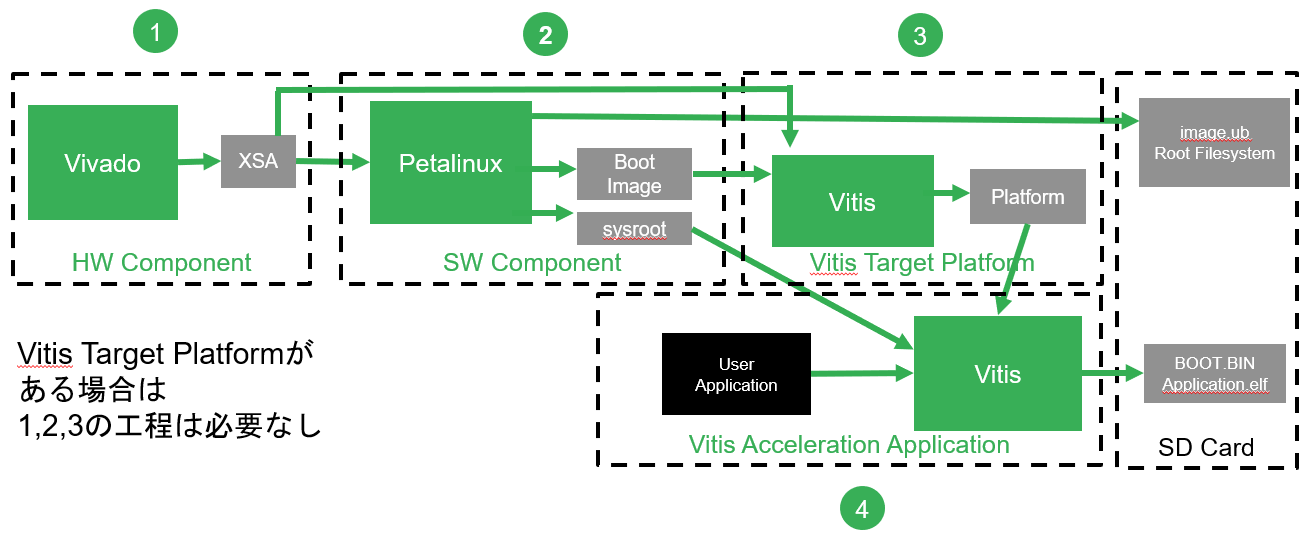
今回は上図の②の SW Component の簡単な Flow をご紹介いたします。

Vitis で Acceleration Application を実行するためには Zynq の ARM CPU で Linux が動作する環境が必須です。ここでは Zynq の Linux Image を作成します。
petalinux-create
PetaLinux で新規で Project を作成します。Proejct 生成では、Project Nameと、使用する Device の Template (ここでは zynqMP) を指定します。
$ petalinux-create -t project -n <Project Name>–template zynqMP

petalinux-config –get-hw-description
Vivado で Vitis Target Platform 用に作成した .xsa を指定し、Hardware の設定情報を PetaLinux Project に反映させます。Proejct の設定反映では、.xsa が置かれている Direcoryを指定します。
$ petalinux-config –get-hw-description=<.xsa Directory
また、Command を実行すると、Configuration の画面が表示されるので、必要に応じて対象の Board の設定 (MACHINE_NAME、stdin/stdout、Root File System Type、etc.) を実行します。

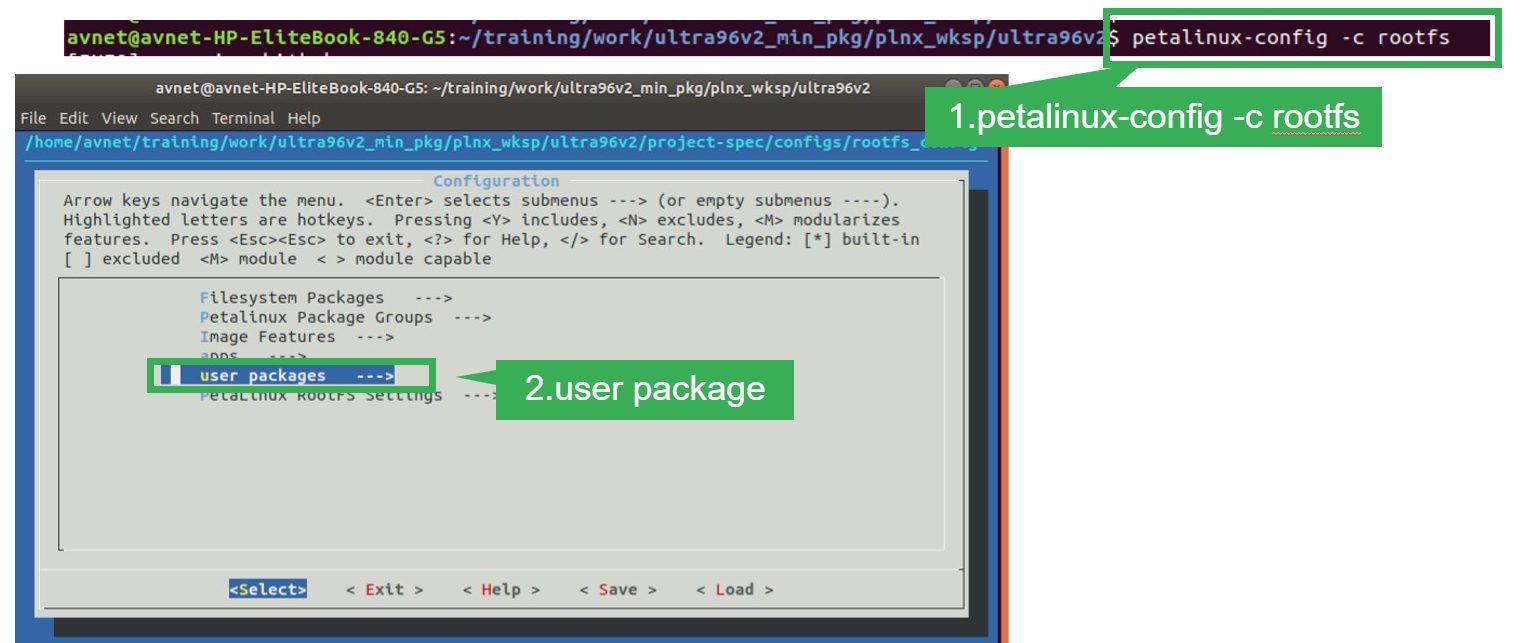
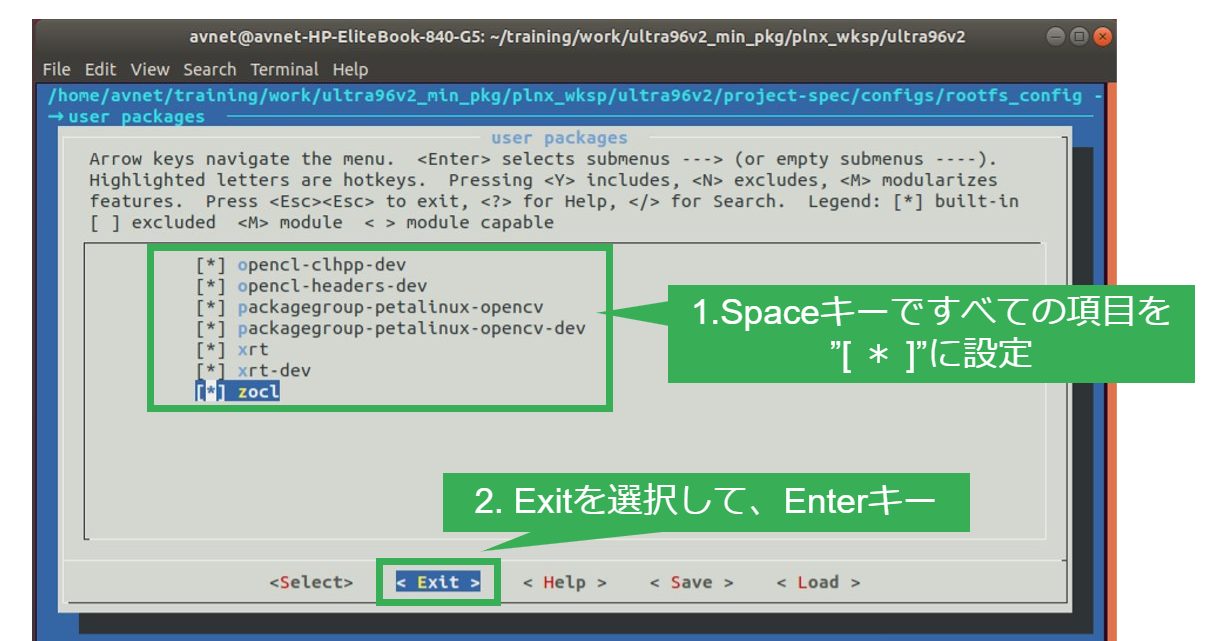
petalinux-config -c rootfs
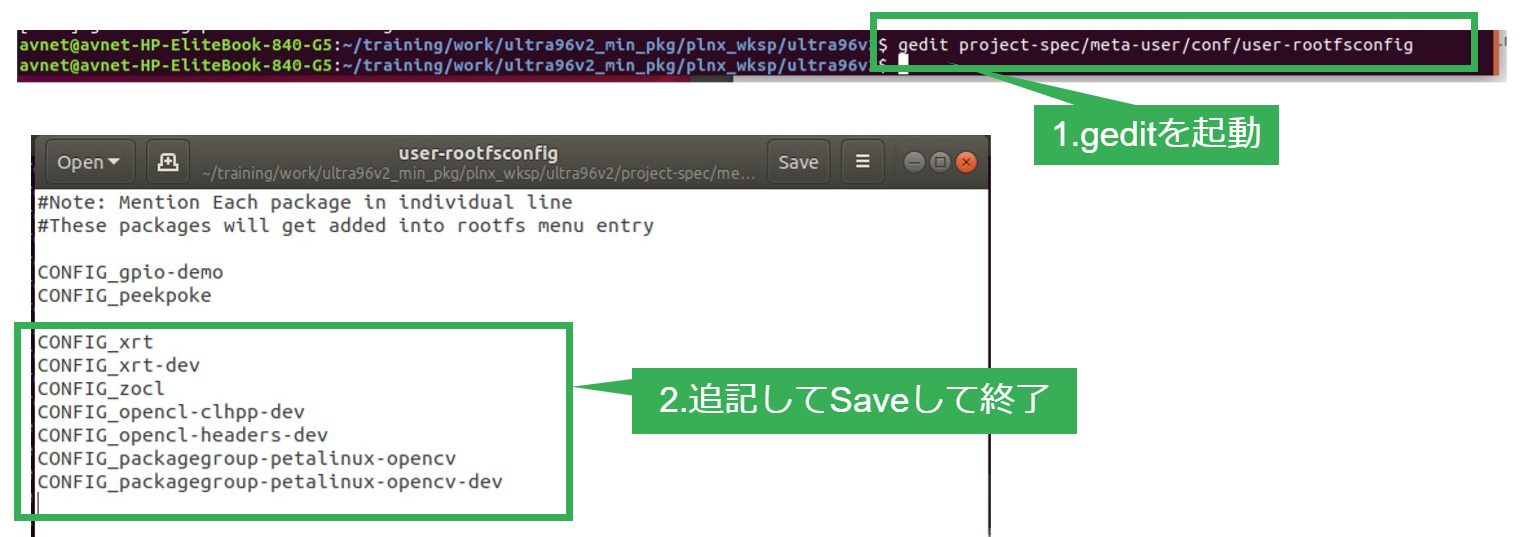
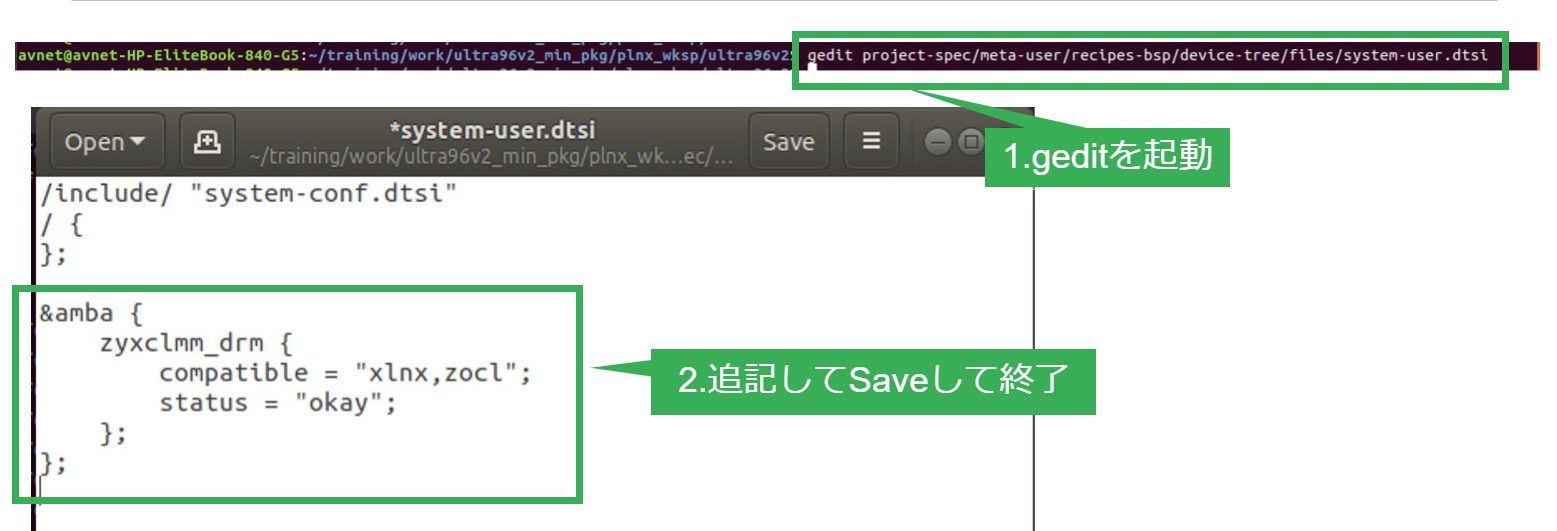
Root File System に Vitis Target Platform に必要な User Package を追加します。これらのUser Package は XRT の OpenCL Runtime API を呼び出すために必須です。追加するためには Command を実行する前に Text Editor (gedit など) を利用して、Configuration File を編集します。編集後は、Command を実行し追加した Package を有効にします。
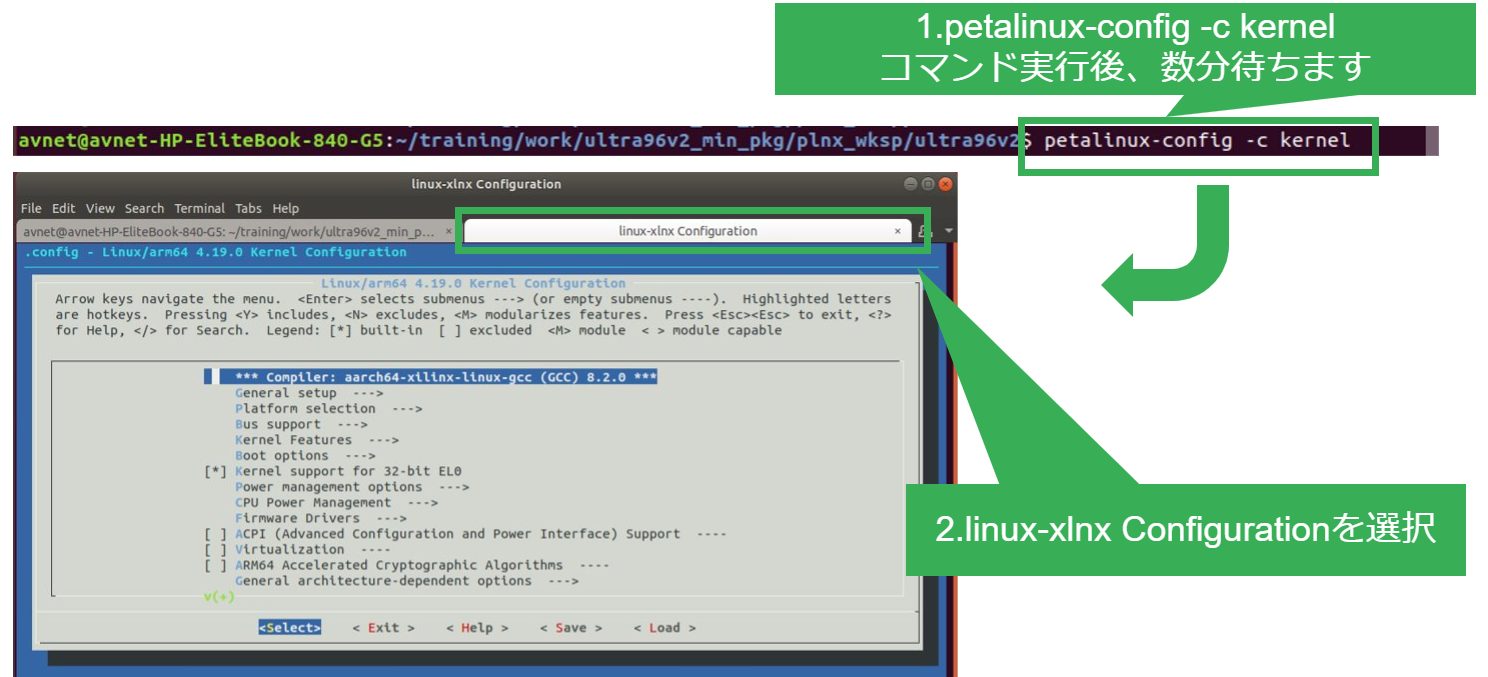
petalinux-config -c kernel
Device Driver の追加や Kernel の設定変更を行います。今回は特に変更がないため、実行する必要はありません。
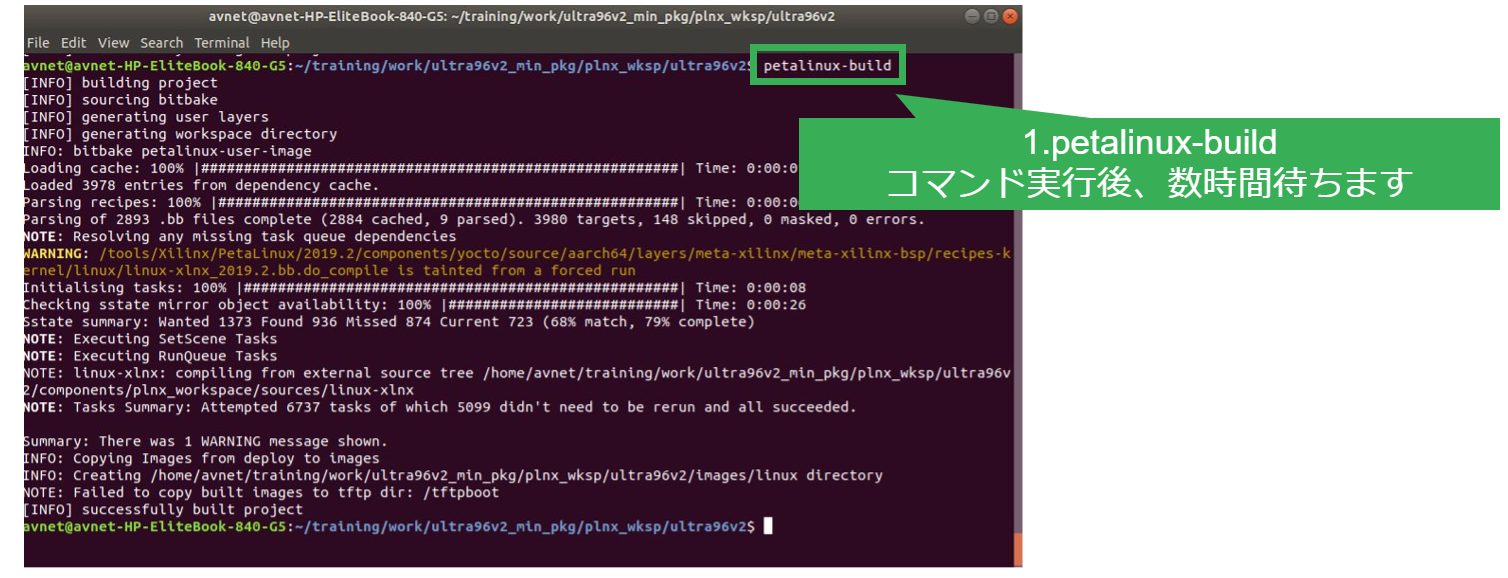
petalinux-build
Linux Kernel に必要な Image すべてを構築します。この Command は Network や PC Spec にもよりますが、非常に時間がかかります。設定に漏れがないかよく確認しておく必要があります。また、Project の容量が 10 GB ほどなので、HDD の容量を多めに確保しておくと安心です。
petalinux-build –sdk
Linux Application を構築するために必要な Header および Library が含まれている sysroot を生成します。こちらも非常に時間がかかります。

以上で、PetaLinux による Kernel 構築は完了です。次の記事では、Vitis Target Platform を完成させ、実際に Acceleration Application を生成します。
AVNET K.K. 仲見 倫